
While you may not even consider them a factor initially, sticky elements can truly improve any website. On the opposite end of the spectrum, the lack of sticky elements can damage it. If you’re a bit confused about this whole sticky spiel, let us explain it to you like you are five.
When scrolling down a site, there’s a part of it, like a menu that’s following you around as you go. This part we call a sticky element because it’ll always stay near you no matter how far down you go. But for what? What are its benefits?
The Benefits of Sticky Elements
Two of the most talked-about benefits of sticky elements are more straightforward navigation and, as a result, user experience. A user that’s visiting your site can easily reach other parts of it.
They use a menu or a header that follows them around. This way, they’ll have an overall better experience since they won’t have to go searching around trying to find another page they might be interested in. It’s that simple.
To add sticky elements to a WordPress site, you’ll need a plugin, and there’s a whole slew of them on the market. That’s why today, we’ve decided to review a relatively new one that promises everything sticky and more. Let’s see what WP Sticky has to offer.
WP Sticky
WP Sticky is a premium WordPress plugin, and it’s pretty new to the game. However, despite its recent arrival, it has already managed to rake up more than a handful of positive reviews and happy users. But, since you do have to pay for it, it’s worth giving it a test to determine if it’s worth the purchase.
In essence, this plugin claims to be blazing fast, works well with other plugins. Furthermore, it even offers more than a handful of easy-to-use features for both beginners and professionals alike.
One of its standout features seems to be the visual picker. It allows you to eliminate messing with any code from the equation, which is ideal for beginners. So, let’s see it in action and see what it can do.
First Steps
You must first download it from WordPress’s plugin repository and activate it with your license key, just like any other plugin.
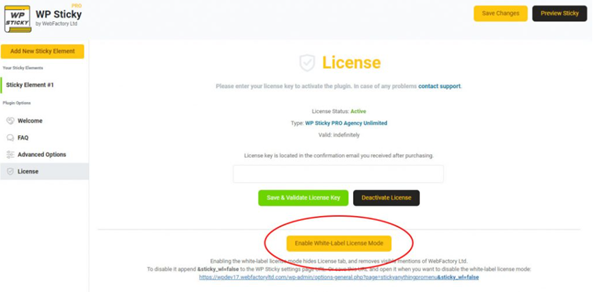
Also, we have to note that if you’ve used the free version before, make sure to replace it by uploading the new premium version to your WordPress installation. If you need to activate the white label mode right off the bat, navigate to “Settings,” open the License tab and click on the “Enable White Label Mode Button.”
Working With the Plugin
To add a sticky element, find the WP Sticky Pro icon under Setting, and the “Add New Sticky Element” button should be in the upper left corner of the page. Once you open the editor, you’ll soon realize that it’s split into two parts.
You will notice that those parts are the Basic options and the Advanced. So, if it’s something simple you require, it seems you can stick with the basics and be done with it. However, if you’d like to tinker a bit more and customize the sticky element down to a tee, the Advanced Settings are also available.
Basic Options
After naming the element, you’ll reach the visual picker. And we must say, this is a handy feature. It speeds up and simplifies the process for those with no prior experience with web design.
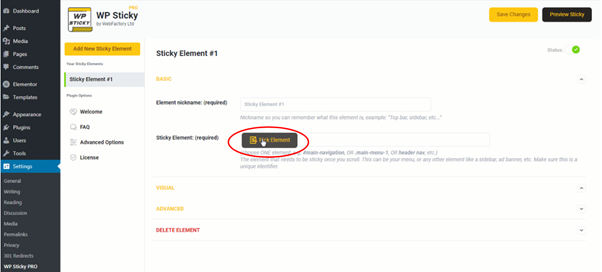
By clicking the “Pick Element” button, you will activate the visual picker. The plugin will then load up your site and add a WP Sticky menu on the top.
As you move the cursor around, small yellow lines will appear around each element. That’s how you’ll know which one you’re choosing. Once the item you want to make sticky has been isolated, click on it. Further, the plugin will write down a unique identifier for you.
But, it is worth noting that there’s no need to use the visual picker if you know the identifier of the element you wish to use. All you have to do is write it down, and that’s it.
Within the Basic Option, you’ll get to edit the visual aspects of your new sticky element. However, for them just being the basic options, there’s a whole lot one could do.
Visual Options
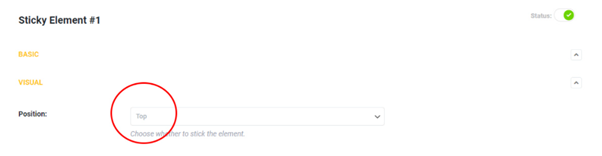
The customizable option is the placement, whether the element will appear on the page’s top or bottom.
There’s also a pretty handy feature here. It allows the user to add a space between the top of the page and the sticky element. To avoid the sticky part appearing too clunky and near the top while scrolling. Not something you’d typically even think about, but we’re glad it’s there.
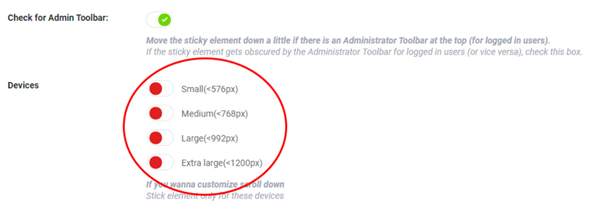
The next thing you can do is check for the admin toolbar, which means that the admin toolbar won’t obstruct the view of a logged-in user.
Also, they’ll get the same experience as a non-logged-in user. Our next stop is “Devices.” Here there’s an option to remove the stickiness, if you will, of any element based on screen size. Sometimes, if a sticky element is too large, it can overpower the small screen.
So, check what it looks like if you plan to use it and customize it to your needs.
There are also optional features here that make it possible to add an effect. Such as a “fade-in” or “scroll down” also, setting the opacity, so it’s not too in your face.
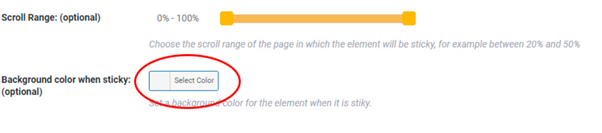
The Scroll Range feature can also be pretty nifty as it allows you to remove the sticky element at whatever point of scrolling. 20% of the page, 50%, never? Whatever you desire. In addition, you can also add background color to make the element more visible or visually appealing.
And don’t worry if you know how to code and want it to have a little more zip. You’ll be glad to hear that you can also add custom CSS if you so desire.
Advanced Options
Since the Basic Options alone are plentiful and you really can make pretty much whatever you want using them alone. We’ll give you a brief overview of the Advanced Options, and you can dig a bit deeper if you decide to get WP Sticky.
- Do not stick when the screen is smaller than X
- Do not stick when the screen is larger than X
- Push-up element – Move back the sticky element to its original opposition when the user scrolls to it.
- Do not stick here – Choose specific pages where the sticky rule does not apply.
- Delete – Don’t need it anymore? Just click a button, and it’s gone.
Support
As far as support goes, the plugin provides plentiful documentation that can help every step of the way. If you still can’t get something to work or have questions, you’re more than free to contact the friendly support team that’ll answer promptly. Plus, the support is not outsourced; you’ll get the help you need from the people who built the plugin.
Pricing
There are three different pricing plans to choose from. And if you’re a site owner, chances are you’ll only need the Single or the Team plan; the former currently stands at 39$, while the latter will cost you only 49$.
However, if you have more than three sites or plan to use this plugin’s white-label mode to work with clients, you’ll have to consider the Agency plan for $ 99.
And yes, this may seem steep to some, but it is essential to keep in mind that this is a one-time purchase. So, you’ll get to hold onto it forever. No pesky subscription fees for this plugin, and we reckon we’ve all had enough of those for a lifetime.
Final Verdict
As you could probably tell by the review, we quite like this plugin. It helps with navigation, it’s super-easy to use, and offers a multitude of customization options.
So, there isn’t anything we could hold against it. Sure, some might think it’s a bit pricey, but considering all the features that come with it, we’d say the price is more than reasonable. Overall, we would most certainly recommend this plugin to anyone looking for sticky elements plugin and wants to customize it down to a tee.